If the device has already been set up, you can follow these steps to join the device to AzureAD.
- Open
Settings, and then selectAccounts. - Select
Access work or school, and then selectConnect.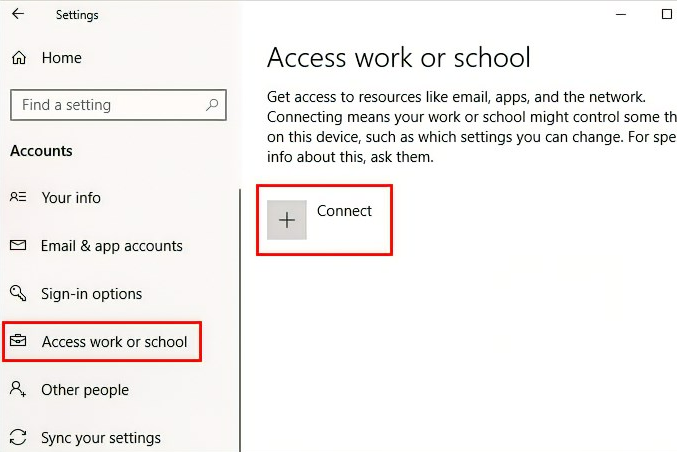
- On the Set up a work or school account screen, select
Join this device to Azure Active Directory.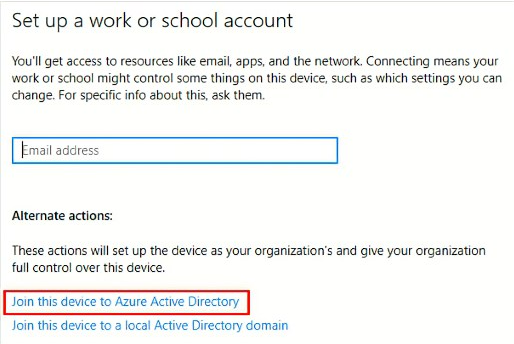
- On the
Let's get you signed inscreen, type your email address (for example, alain@Company portal .com), and then selectNext.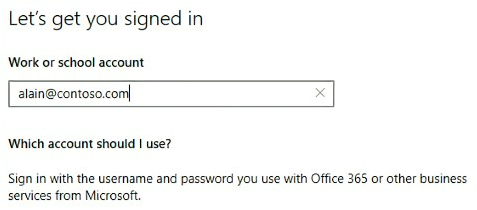
- On the
Enter passwordscreen, type your password, and then selectSign in.
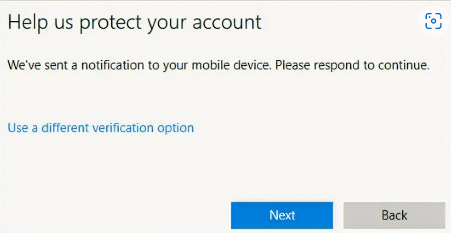
- On your mobile device, approve your device so it can access your account.
- On the
Make sure this is your organizationscreen, review the information to make sure it's right, and then selectJoin.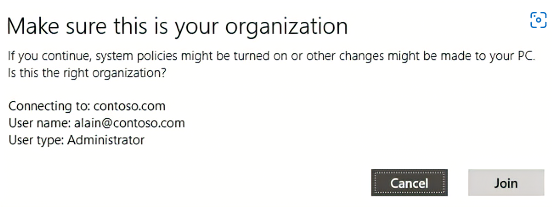
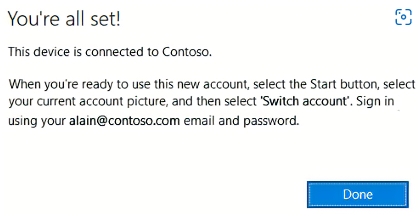
- On the You're all set screen, click
Done.