Knowledgebase

If the device has already been set up, you can follow these steps to join the device to AzureAD.

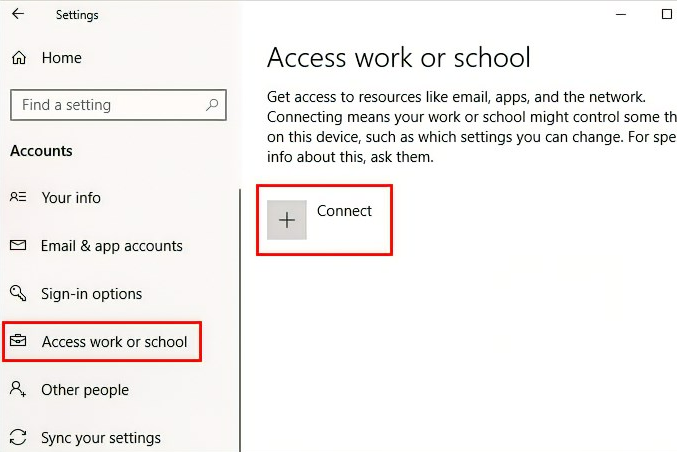
  1. Open Settings, and then select Accounts.
  2. Select Access work or school, and then select Connect.
    220065-image.png
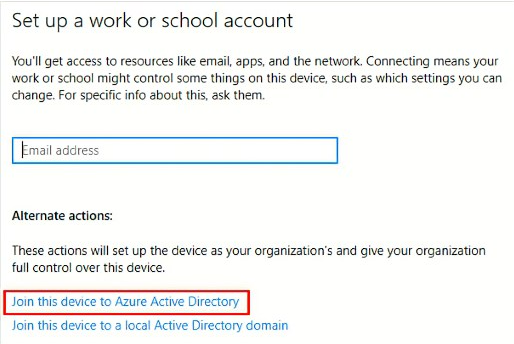
  3. On the Set up a work or school account screen, select Join this device to Azure Active Directory.
    220102-image.png
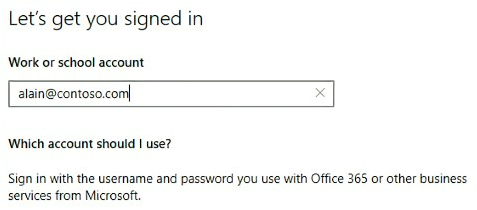
  4. On the Let's get you signed in screen, type your email address (for example, alain@Company portal .com), and then select Next.
    220083-image.png
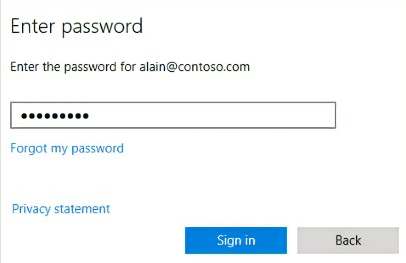
  5. On the Enter password screen, type your password, and then select Sign in.
    220050-image.png
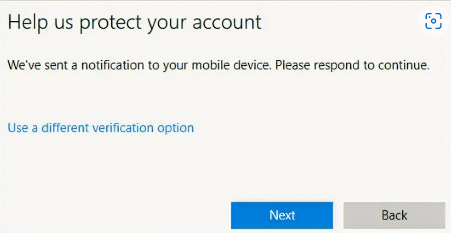
  6. On your mobile device, approve your device so it can access your account.
    220028-image.png
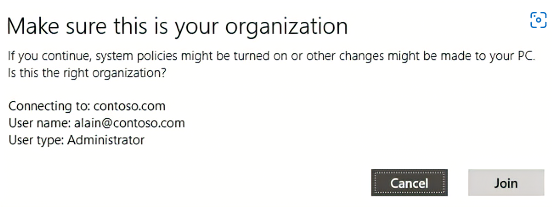
  7. On the Make sure this is your organization screen, review the information to make sure it's right, and then select Join.
    220055-image.png
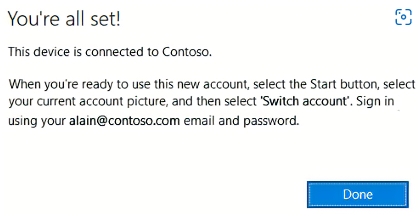
  8. On the You're all set screen, click Done.
    220066-image.png

Format
Record Type: TXT, Hostname: _dmarc, Value(s): v, p, rua (required)

Example:

TXT    _dmarc    v=DMARC1; p=quarantine; rua=mailto:it@redcelltechnologies.com;


Notes:
You do not have to append .domian after the _dmarc . This is done for you by the DNS provider.

Change rua email address to a customer specific address.

The following commands will be helpful if you want to hide all the WiFi networks and allow only a particular one.

You need to allow a WiFi network first, so execute the following command to do this:

netsh wlan add filter permission=allow ssid="Wireless Network Name" networktype=infrastructure

To hide all the networks except the allowed network, execute this command:

netsh wlan add filter permission=denyall networktype=infrastructure

If you want to remove the “deny all” filter or you want to remove all the network names from the blocklist, the following command will do the job:

netsh wlan delete filter permission=denyall networktype=infrastructure

In case you have forgotten the wireless network name or you just want to see the blacklist or whitelist, here is the command that you need to use:

netsh wlan show filters

https://www.youtube.com/watch?v=RyaJ8eNoYpk&ab_channel=ValiantTechnology

Run batch file and wait for it to complete. It will take some time, but it works!

Download batch file and save in c:/Temp

Open Command prompt with Administrative premissions

Type

cd c:/temp

hit enter

then type Reset_Reregister_Windows_Update_Components.bat (for windows 10) or

Reset_Reregister_Windows_Update_Components_for_Windows11.bat (for Windows 11)

hit enter

Let it compete and then reboot the computer. Voila Windows Update works!!

For Windows:

Run the attached script from PowerShell in Administrative context. Save in C:\Temp

Type:

cd C:\Temp

UninstallLabTechAgent.ps1

Then you can go into Add Remove Programs and uninstall the Screen Connect Applications and reboot the PC.

For MacOS:

  1. Open Finder > click Go to folder > opt.
  2. Write down specific screenconnect name
  3. Remove all files containing ConnectWise Control or ScreenConnect from the Downloads folder on the Mac.
  4. Open the Terminal, then run the commands indicated below, one at a time.
  5. Reboot the Mac.
  • sudo rm -r /opt/connectwisecontrol*
    sudo rm -r /Library/LaunchDaemons/connectwisecontrol*
    sudo rm -r /Library/LaunchAgents/connectwisecontrol*
    sudo rm -r /opt/screenconnect*
    sudo rm -r /Library/LaunchDaemons/screenconnect*
    sudo rm -r /Library/LaunchAgents/screenconnect*